What if one overlooked feature in Microsoft Word could save you time and improve your writing – in minutes?
It’s kind of like the locker loop on the men’s oxford shirt.
You may have seen it without ever wondering why it exists. The Gant Company modified the classic Brooks Brothers button-down with this extra bit of fabric at the back of the shirts to keep them wrinkle-free when hung from hooks.
Don’t miss the built-in writing tools in your software. Take a look at these 10 features writers often miss.
1 – Flesch-Kincaid Testing
Here’s a quick tip for avoiding “gobbledegook” …
Run a readability test.
The Flesch-Kincaid test was originally developed to improve communication in training materials developed by the Department of Defense. However, the grade levels indicators and scores have long been used as benchmarks by direct marketing advertisers.
Your readability improves as you break up sentences, eliminate fluff words, and reduce the number of syllables per word.
Watch this video for a step-by-step tutorial showing you how to set up the readability testing features in Word 2010.
2 – Autocorrect
Why is it so easy to miss errors in our own writing? We risk new transgressions every time we cut and paste. And minor mistakes vanish like cookie crumbs on an oriental rug. Unless you have your own editor on staff, you need powerful software.
Microsoft Word’s spell-checker catches a broad range of errors and suggests corrections. However, Word also has a feature you may not be fully using: Autocorrect.
To get started with Autocorrect, go to File in your top menu. Then click Options at the bottom of the Left side menu and Proofing in the pop-up.
At the top of the Proofing menu, click the AutoCorrect Options Box.
You can choose from among the following:
- Correct TWo INitial Capitals
- Capitalize the first letter of every sentence
- Capitalize the first letter of every cell
- Capitalize names of days
- Correct accidental caps lock key usage
Set it up to automatically create numbered or bulleted lists, use fraction symbols, put superscript on ordinal numbers (like 1st, 2nd, etc.), or replace text as you type.
The program contains a generous menu of common errors and replacements. Customize the list by eliminating and adding any items you choose.

3 – Read Aloud
Reading aloud instantly exposes errors, awkward transitions, and phrases you would never use in an actual conversation. That’s important for copywriters, because our words are often more effective when they sound conversational. We’re constantly aiming for the proverbial bar talk, game talk, gym talk … or mom talk …
Read your texts to a willing spouse, kid, friend, or dog. Or avoid having to bribe the kids and use Word’s Read Aloud feature. With Read Aloud, you get to be the listener. It’s remarkably accurate. Give it a try.
Look for it in the left part of the sub-menu under Review. Once you activate this feature, a new control panel pops up in the upper right corner of your document. Pick your preferred reading speed and choose from among three speakers:
Microsoft David – North-American male baritone
Microsoft Karen – middle-aged female electronica with a diphthong on her long “O” vowels
Microsoft Mark – a natural tenor
4 – Set Automatic Backups
Don’t risk losing all your work!
Set automatic backups so when your power goes out, you get distracted, or your cat jumps on your back and you spill coffee on your keyboard …
you can return to a reliable and relatively current version of your document.
Set your backups by clicking File and selecting Options in the side menu. Click on Save in the left sidebar menu of the pop-up, and choose your preferred Auto-recover options.

5 – Comment Feature
Under the Review tab, you can choose a color to highlight all your personal comments. If you’re working with a team or editor, you can set one color for all comments or allow MS Word to assign separate colors by author, so you can identify your contributions quickly and easily.
Click the review tab of your top menu and find the “track changes” section of the sub-menu. look for the teensy box in the lower right-hand corner of that section and click it. In the pop-up menu that appears, you can choose a color for all comments or set Word to track changes by author (a random color will be assigned to each commenter.)

6 – Run a Macro
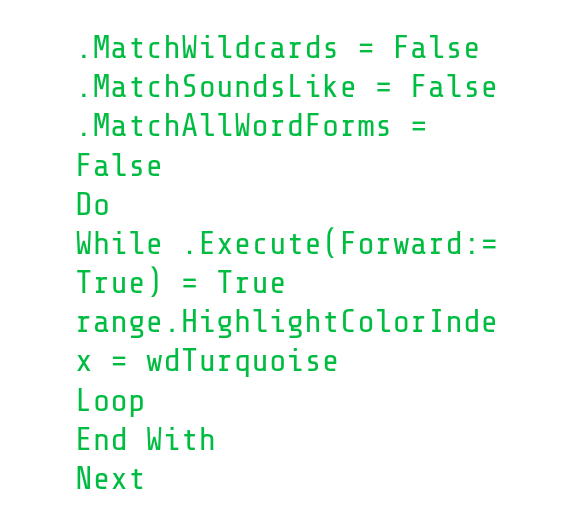
Macros are short stretches of code which carry out specific functions. To get started, go to View in your top menu and select “Macros.” You’ll have the opportunity to create, edit, or run these mini-programs to make your writing sparkle.
Even if your coding experience is limited to putting <h1> tags in your HTML, you can download and customize your own macros in minutes. What can you do with them? You can set them up to highlight filler words and any other words you would like to avoid or replace. For example, you may want a macro on hand to instantly highlight overused weak words like just, truly, and that.
If you have technophobic tendencies, this may sound daunting. Don’t be put off. If you can follow a recipe for spaghetti sauce, substitute your own fresh oregano and rosemary for the “Italian herb” mix, and add a splash of your favorite red wine, you can put a macro in place and customize it. Can’t cook? OK. You may have to get tech help. Find a VA.
For examples and instructions, check out the templates Karen Woodward and C. K. McLeod have generously shared on their sites. Why not customize them with your own modifications?
http://blog.karenwoodward.org/2012/10/check-your-writing-for-adverbs-and.html
http://www.techtoolsforwriters.com/improve-your-writing-with-macros/

7 – Make a Diagram in Your Microsoft Word Doc
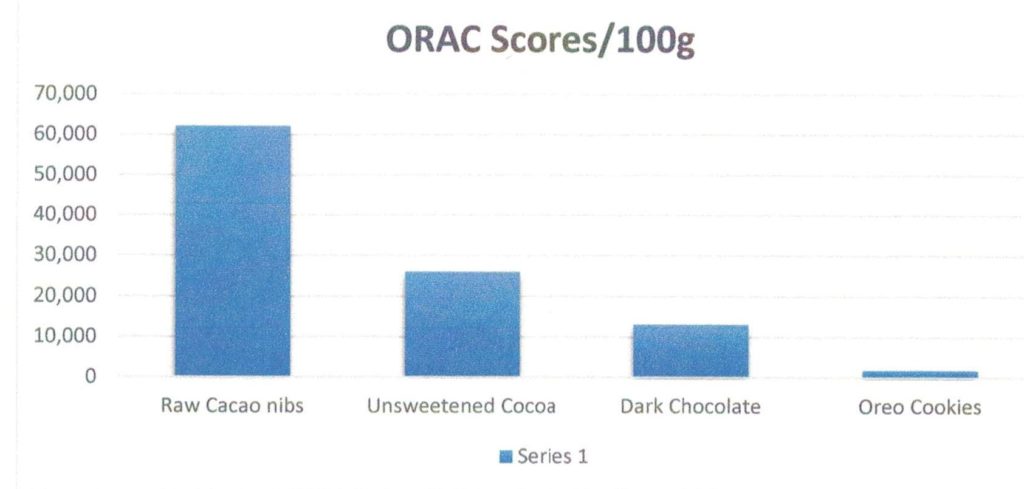
Need a diagram for your post, eBook, or article? You don’t have to leave your Word program or learn to use Photoshop. You can show all your statistics and trends with diagrams you make right in Word.
Go to the Insert menu and choose Chart on the sub-menu. Word 2010 gives you 17 different formats to choose from: Column, Line, Pie, Bar, Area, Scatter, Map, Stock, Surface, Radar, Tree map, Sunburst, Histogram, Box & Whisker, Waterfall, Funnel, and Combo.
Try it out!

8 – Make a Worksheet or PDF Download in Minutes
Make your own PDF Download in minutes with Canva and MS Word.
- In Canva, choose and modify an 8.5 x 11 image template for your front cover.
- Make the body of your handout in a Word doc and add a title page.
- Download your image as a PNG or JPG and paste onto your cover page.
- Then export the whole thing as a PDF. Voila! You have an instant download!
Hint: to find the Cover Page feature in Word, go to Insert in your top menu and select Cover Page on the left-hand side of your sub-menu.
9 – Word Power
Need to replace a word? You may not have to pull out your 2 lb. copy of Roget’s or toggle and click to an outside website.
Simply highlight a word, select Review, and click Thesaurus. A list of substitutes will “appear”, “emerge”, “materialize”, “become visible”, or “come out” in a side bar to the right. Click the pull-down arrow at the end of the word you wish to use. Then select “Insert” to replace your current word with the new term.

10 – Dictation
Word’s dictation feature lives in the far right comer of your Home menu.
It capitalizes your sentences automatically and adds punctuation when you say the words “period”, “comma”, or “question mark”. It turns off automatically when your voice becomes inactive for a short period of time.
Want to compose an essay about a “period” of unrest and still make this work? With the advance of machine learning, that’s something we will likely enjoy in future versions.
Conclusion
With 10 writing tools right under your nose to blast away blunders and the blasé …
Which will you use?


